Galaxy account setup and data-sync
- 20 min
- Medium
Overview
It is possible for LabID to communicate with a Galaxy instance. Doing so allows for sending data from LabID to Galaxy and later retrieve (and register) data that has been processed on Galaxy. This walkthrough helps you to
- Connect LabID and Galaxy accounts (with an API key)
- Send LabID data to Galaxy
- Retrieve the analysed data from Galaxy
Step 1 - Galaxy API key
Step 1.1 - Obtain your Galaxy API key
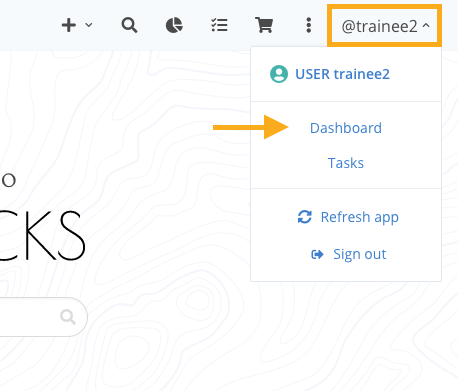
- Go to the User Dashboard
- In the top menu click the username
@traineeXX(on the right) - Then click Dashboard
- Select the tab Galaxy Configuration
- In the top menu click the username
LabID Dashboard
LabID Configure Galaxy

- Click on Configure new instance
- In the dropdown for URL, select the galaxy instance for which you want to configure the authentication
- Then, below the API key field, click Get your API key from Galaxy.... This will take you to the Galaxy instance
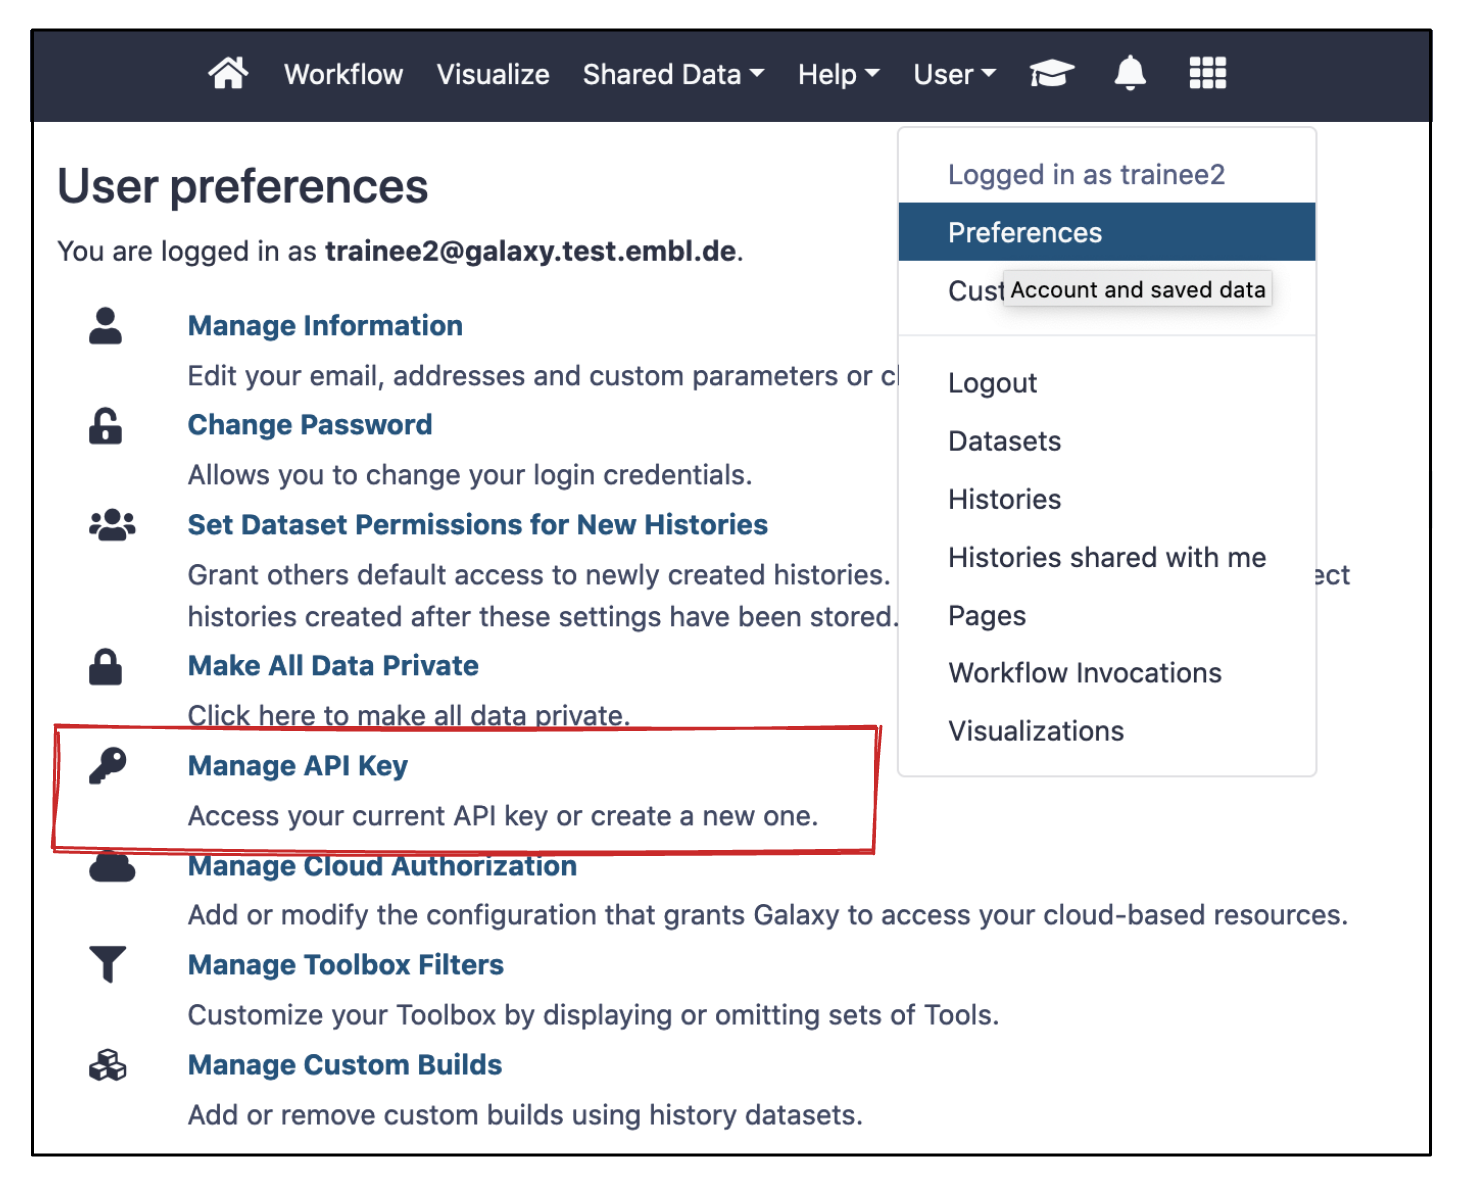
- After login into the Galaxy instance, navigate to User Preference (Top Menu)
- Navigate to Manage API Key
Galaxy training instance at the EMBL
If you are following a training at the EMBL with a Galaxy training instance, login in the Galaxy training instance with your trainee credentials, i.e. same username, password 123456.
Galaxy User Preferences
-
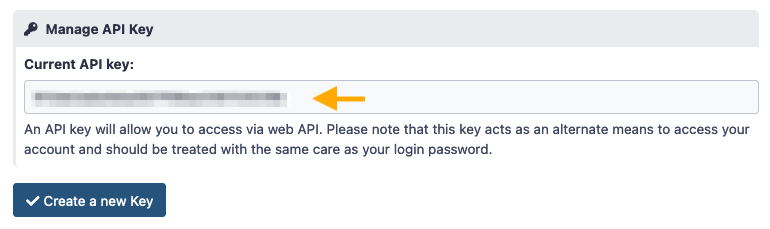
- Click the Create a new key button
- Your API key appears in the Current API key panel
-
Copy this API key
About API Keys
The API key from Galaxy grants anyone or any application access to your Galaxy account. Hence, when we store this key in LabID, LabID can act on your behalf to send and retrieve data from Galaxy. Keep this API key safe, do not share it, unless you trust the application that requires it. You can always generate a new key in Galaxy to protect your account, you will then have to update the key in LabID as well.
Step 1.2 - Store the Galaxy API key in LabID
- Return to the LabID User Dashboard
- Paste your API key
- Click the Save button
Your API key is now configured. LabID knows how to communicate with Galaxy.
Step 2 - (Optional) Add some data to LabID
For this hands-on we need to add some data to LabID first, if you already followed Register Raw Datasets 102 you can use the data from Study Paired-end WGS Darjeeling Tea genotypes for traineeXX or Paired-end WGS Coffee arabica genotypes for traineeXX
- Using the dropbox add the GSM461178_untreat_paired_chr4.bam* file.
- Upon the
Verifypage select a personal study
Add data using the dropbox
bam file and your personal Study
Step 3 - Sync data to Galaxy
Data of entire assays or studies can be synced to Galaxy. In this hands-on, we want to sync a whole study.
At EMBL
At EMBL, we host a Galaxy instance at https://galaxy.embl.de and you can setup your account similarly as we did in this tutorial. With your own data, you would typically sync your LabID data to a Galaxy library named after your group.
- Navigate to the Study Detail page of the Study used in the previous Step. Click the Sync with Galaxy
Study is named Paired-end WGS Darjeeling Tea genotypes for traineeXX or Paired-end WGS Coffee arabica genotypes for traineeXX
Study Detail page - Sync with Galaxy button
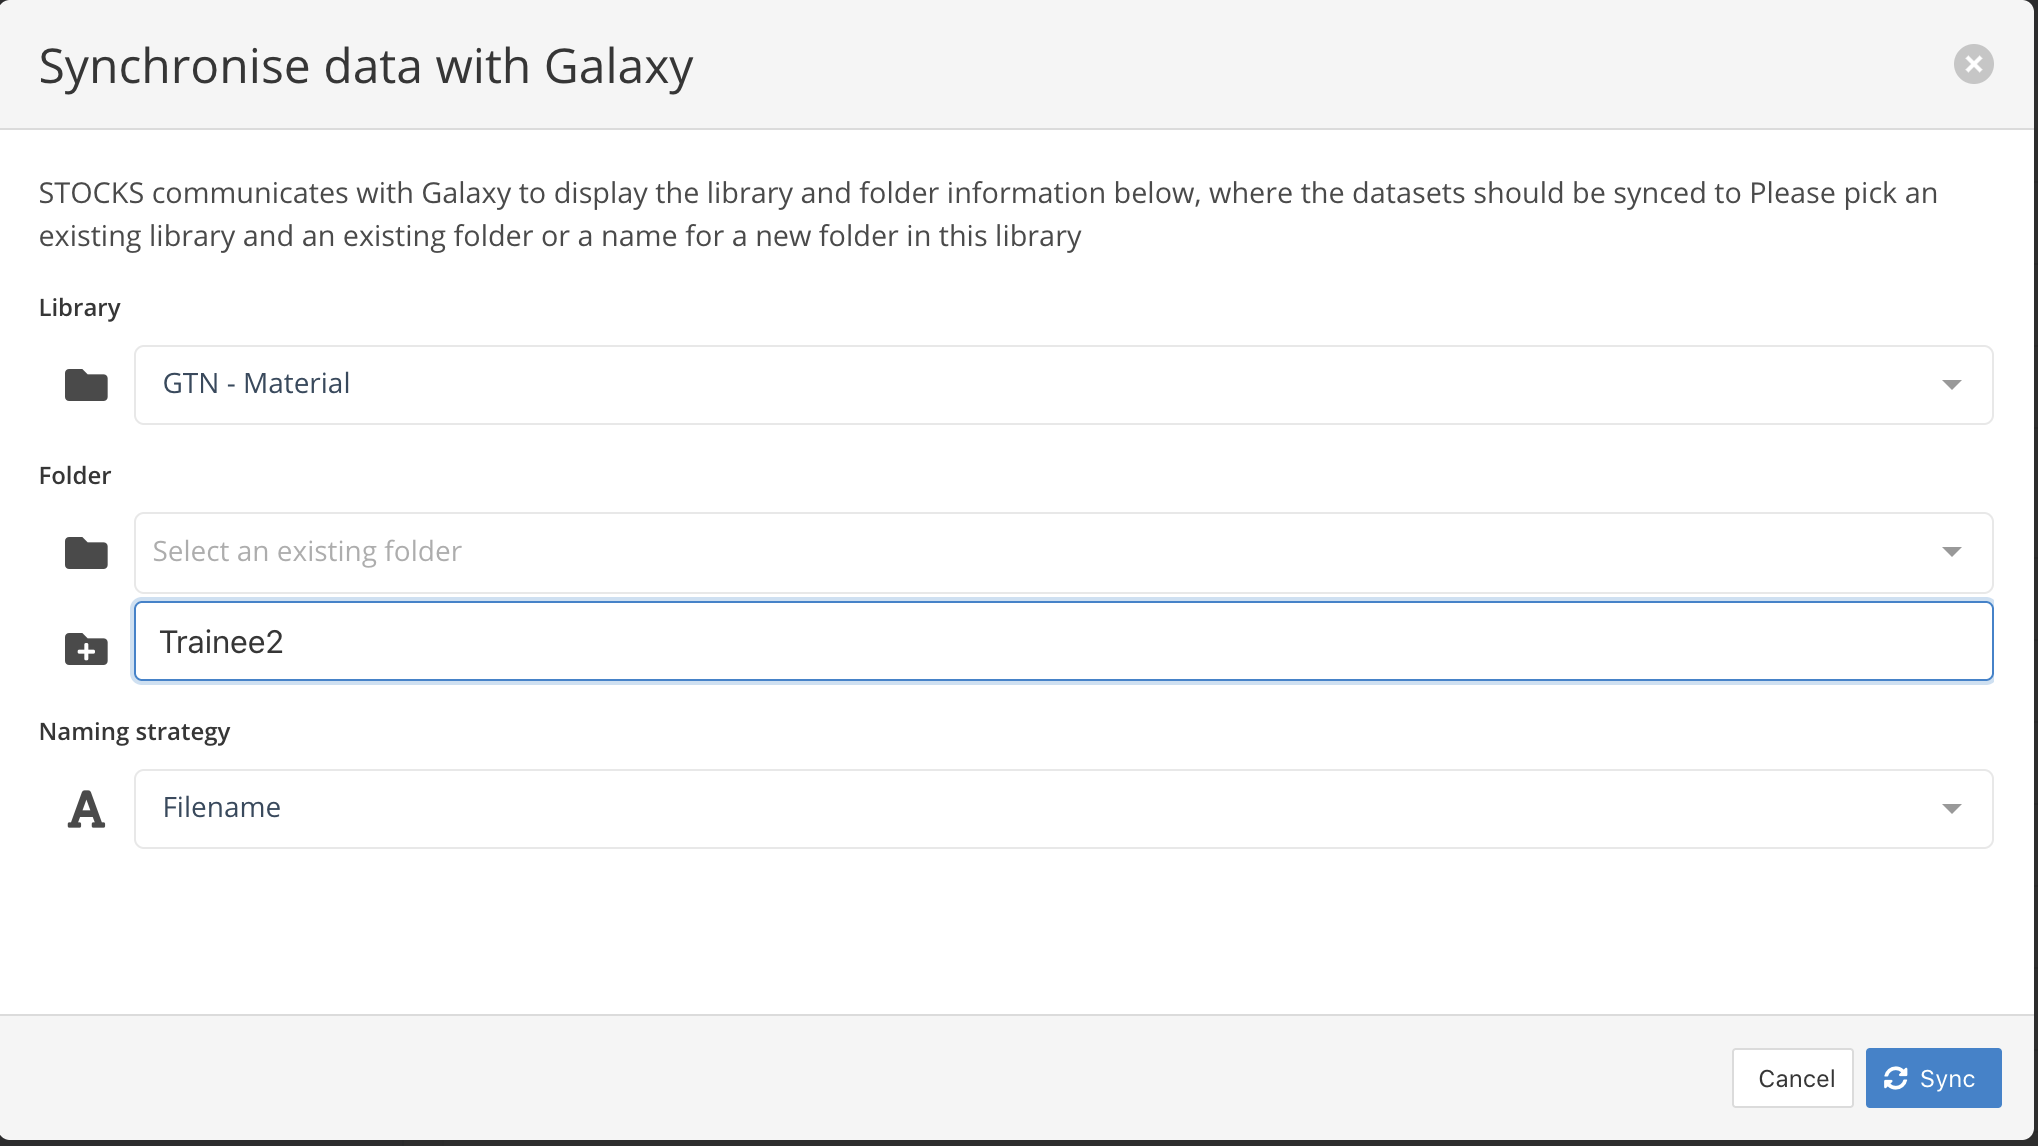
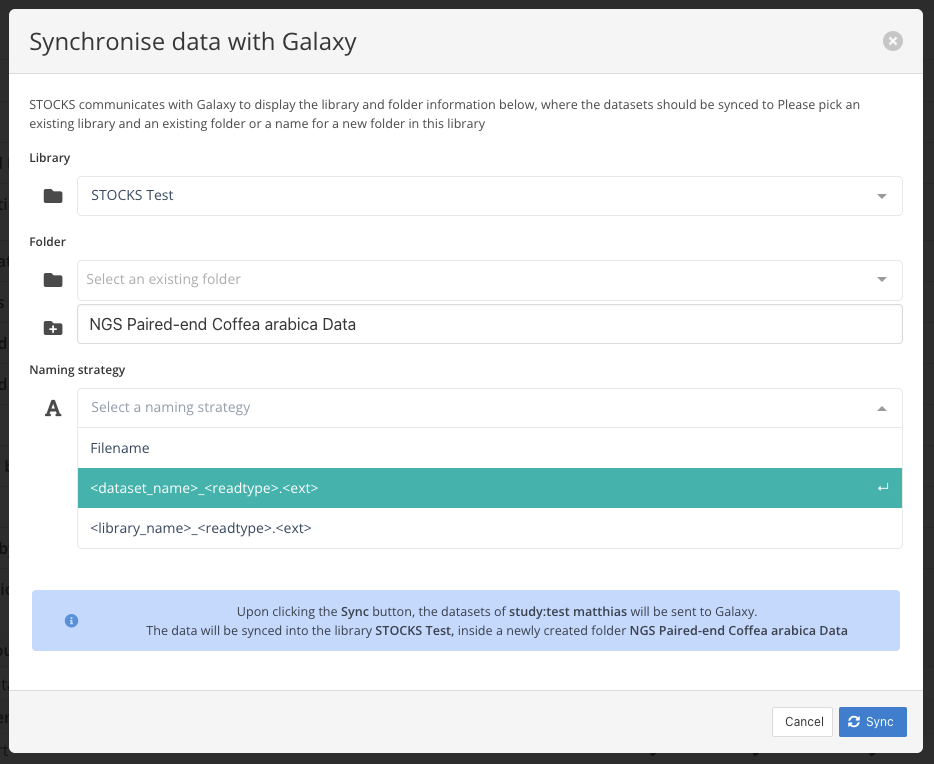
- On the "Sync with Galaxy" popup, a few options are presented
- The Libray where the data should be transferred. Here we pick
GTN - Material - A folder within this library, either existing ( ), or create a new one with a given name ( ). Give a new name like
TraineeXX - A naming stratagy. Files created within Galaxy will follow the given naming strategy. Here we pick
Filename, this will keep the current filename as it was originally named on disk.
- The Libray where the data should be transferred. Here we pick
Sync with Galaxy pop-up
Naming strategy
Depending on your data, you can choose a different naming strategy. When syncing fastq files, it makes sense to include the readtype in the name, if it is not already in the Dataset name. The <library_name> refers to the linked SequencingLibrary you may have linked to the raw fastq dataset. If on the other hand, you loaded data with already sensible filenames, you can plainly select "Filename" to sync the file as is.
- When ready click Sync
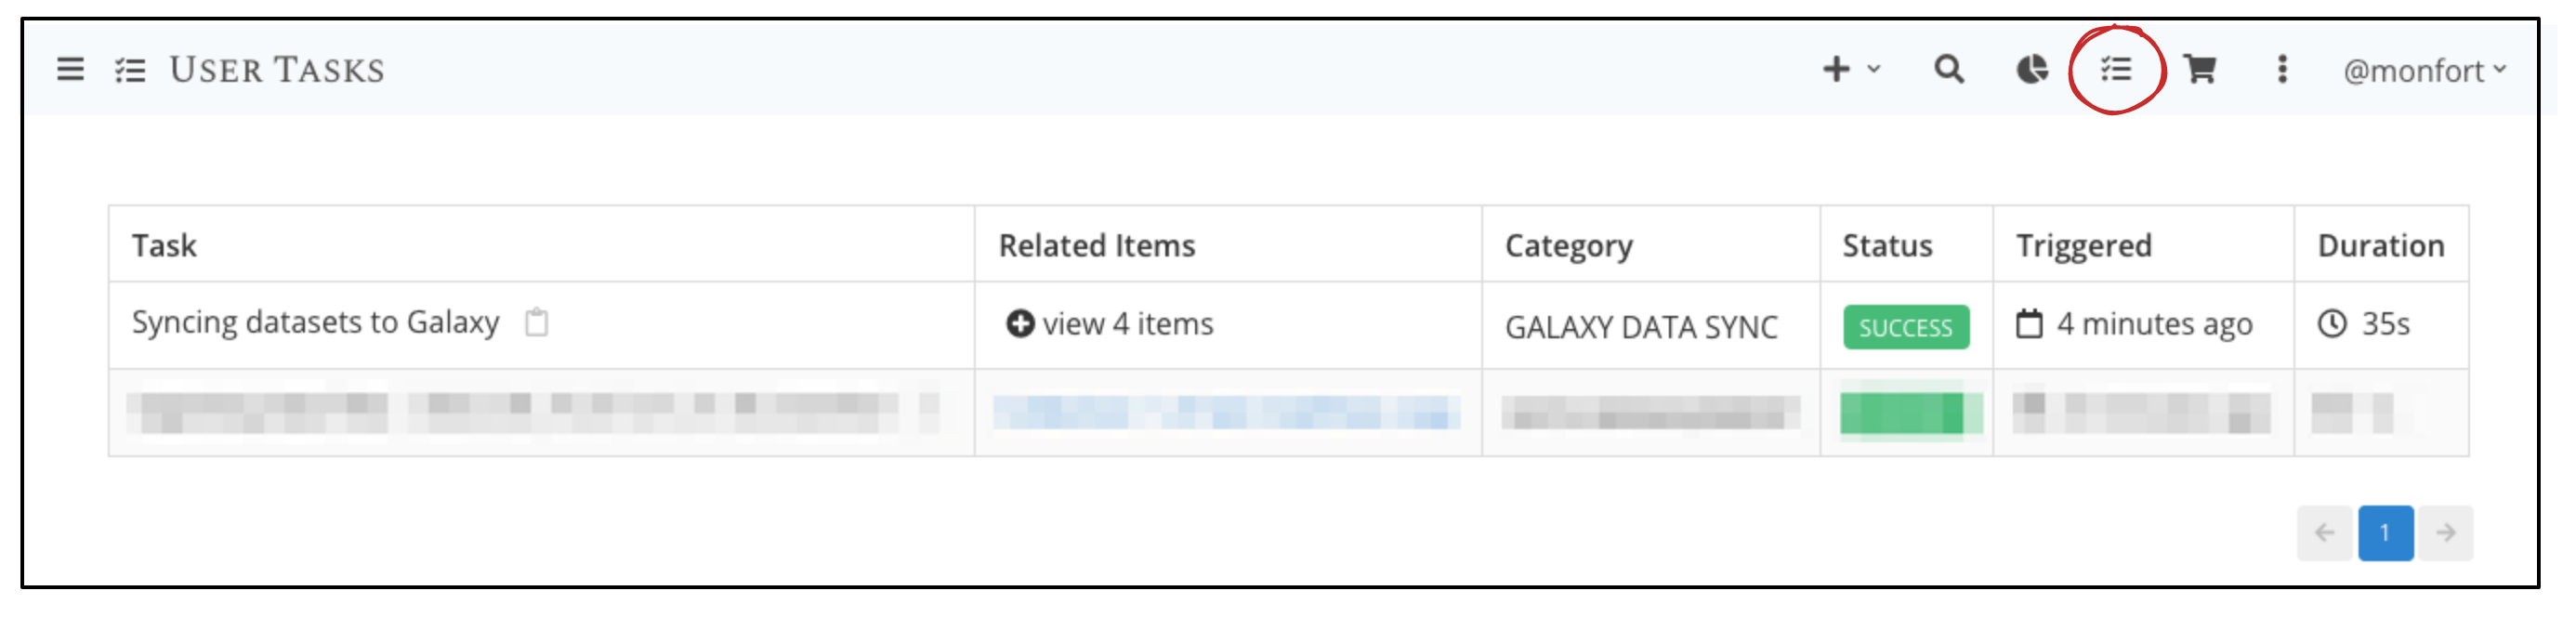
This triggers a syncing task. You can view the status of the syncing task on the Task List page.
Task list with successful syncing task
Step 4 - Find and use the data in Galaxy
In Galaxy the data becomes available in the library and folder it was synced to. In our case, it can be found in Library / GTN - Material / TraineeXX.
Galaxy Data library
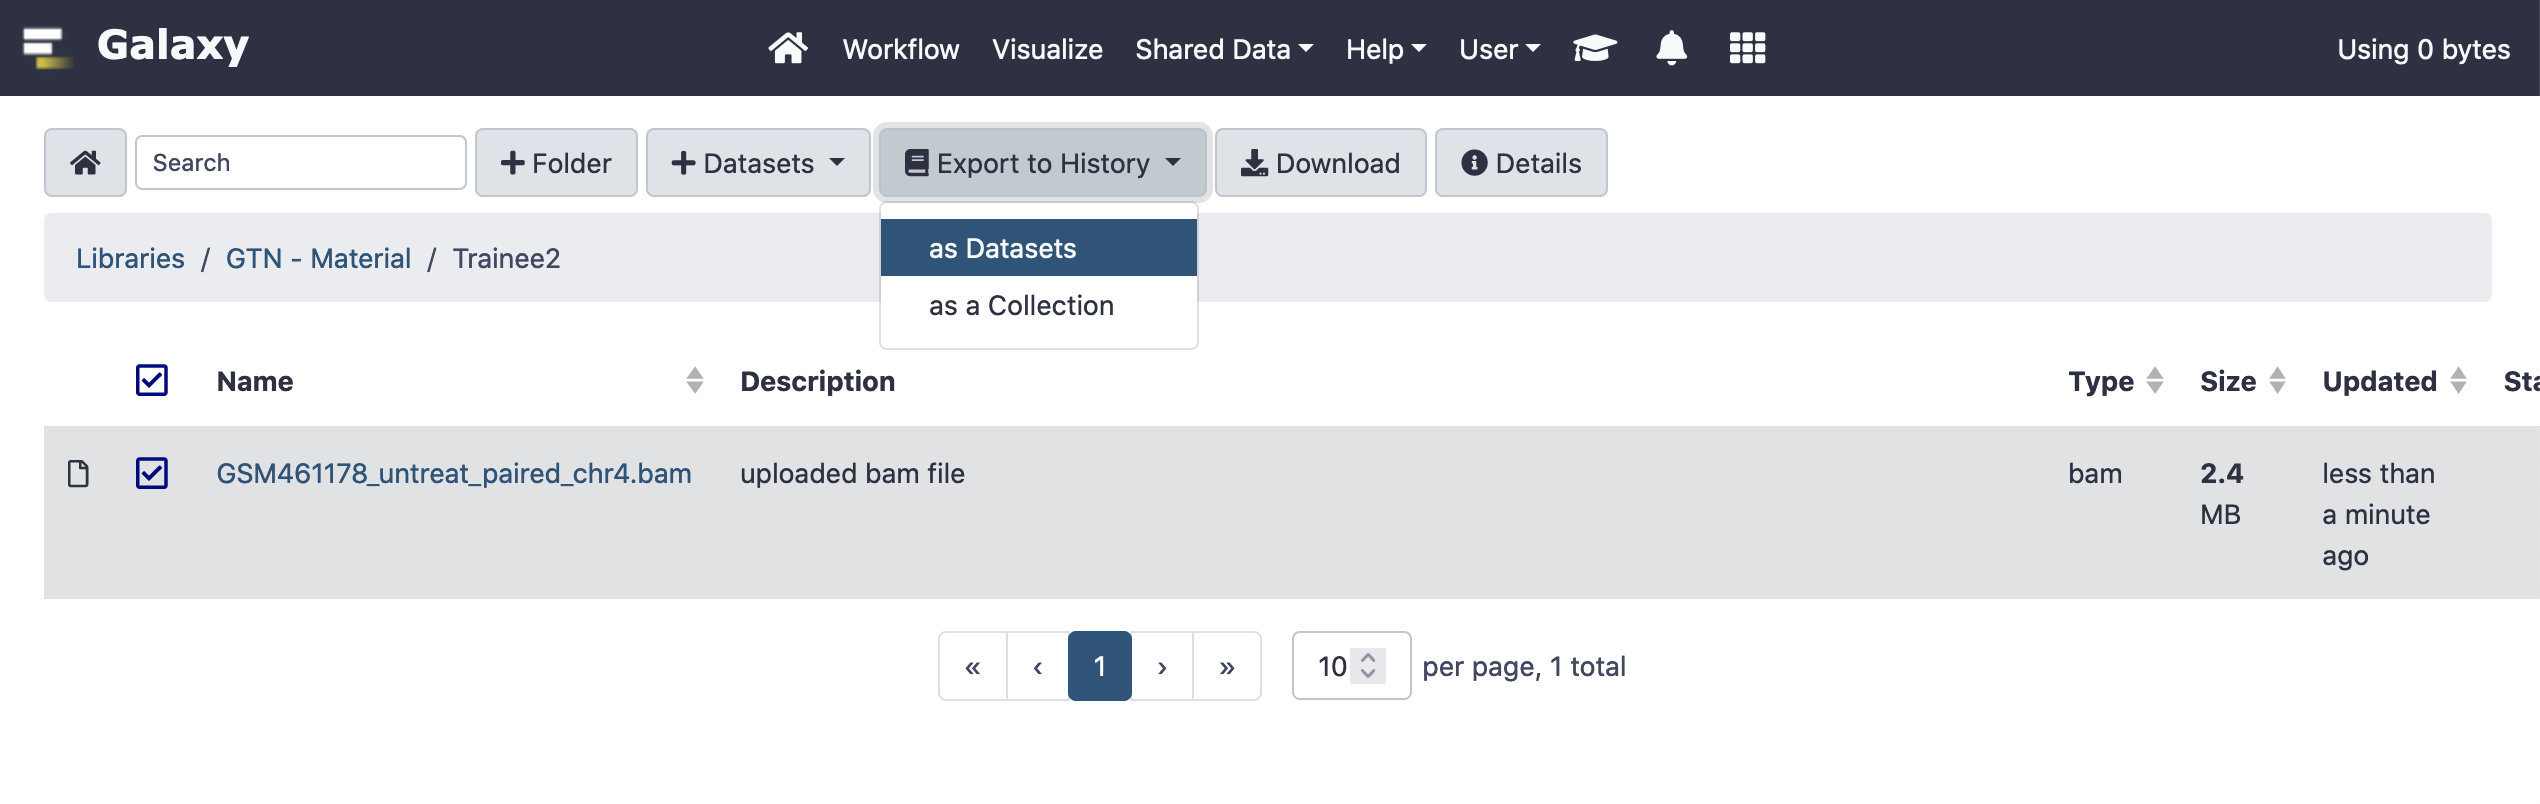
- This data can be imported to a history by selecting the file(s) and clicking **Export to History->as Datasets"
Galaxy history
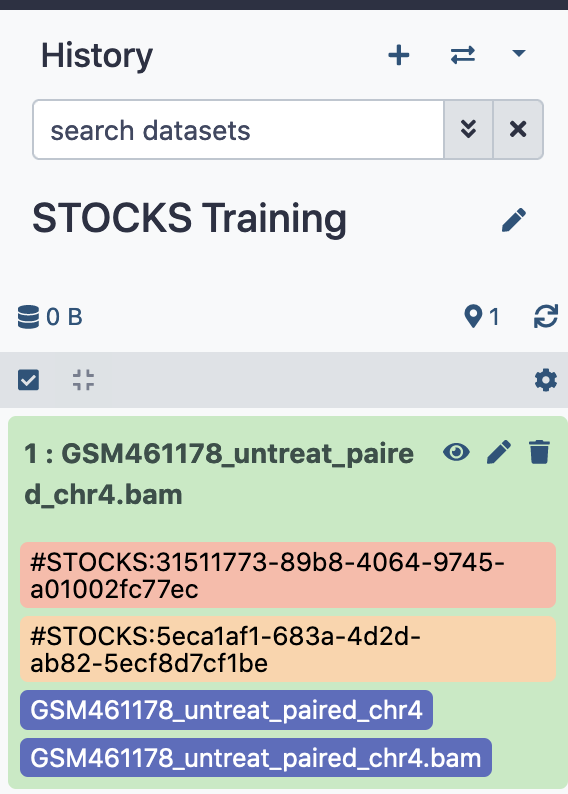
Once your data is in your history, you can start analysing your data. If you are unfamiliar with Galaxy, we suggest you have a look at the great Galaxy training material available online.
Tags
Each Galaxy dataset has multiple tags starting with LabID:. These tags, show the LabID ID of a Dataset and the DatafileCopy. As these tags are inheritable, they are set on every newly derived dataset in Galaxy. This allows us to always find back the original dataset underlying the final derived dataset.