Hands-on: Register a Nextflow workflow run via the web interface
- 20 min
- Easy
Once you have imported or created workflow version(s), you are ready to create associated Workflow Runs, to document the execution of these workflow versions with actual data.
About workflow runs
By Workflow Runs, we mean here the execution of a particular Workflow Version on input datasets using specific configuration & parameters, typically resulting in the creation of output datasets.
Registering workflow runs in LabID allows to easily keep track of all this information:
- version of the workflow used for the run
- datasets used as input
- output datasets generated by the run
- additional metadata about the run (command line options, execution status, date of execution...)
While you can directly import workflow runs from a Galaxy instance (so-called "invocations" in Galaxy), for other workflow managers there are currently 2 options to register Workflow Runs:
- manually create a workflow run in the web interface (this tutorial)
- use the command line interface (CLI) to register workflow runs automatically
IN this tutorial, we will register a Workflow Run for a fictive execution of the nf-core/demo workflow (Nextflow).
If you use the LabID demo server, you don't actually need to execute this workflow to follow this tutorial : the server already has the example data. If you want to, you can execute the workflow by following this dedicated tutorial.
Prerequisites
For this tutorial, you will need a Workflow Version in LabID corresponding to the nf-core demo workflow. We will then associate a new workflow run to this workflow version. The workflow version can be created by importing from the GitHub repository of the nf-core/demo workflow. The instructions are covered in a previous tutorial (Hands-on : importing workflows) just replace the URL for the workflow repository with the following URL: https://github.com/nf-core/demo/. You can select the latest release, at the time of writing this tutorial this is v1.1.0.
Recommended : release "hand-crafted" workflow version before registering workflow runs
When importing from GitHub or other workflow repository, the Workflow Version is automatically marked as "released" (so not editable) and "published" (in an external repository).
You can create "hand-crafted" workflow versions in LabID by drag and dropping local files. Before associating these kind of workflow versions to workflow runs, we recommend first "releasing" them ! Released workflows versions cannot have their file edited (only the metadata), the idea is to ensure that workflow versions associated to workflow runs should not be changed to ensure it corresponds to the version that was executed.
Step 1 : Register the input data
Step 1.1 : Select Assay
Let's consider that the input of our demo workflow run, is some raw data that was generated as part of an assay.
You would typically start by registering this data together with the assay.
- click on the left on Import datasets then Import raw datasets
- for the assay type select Illumina sequencing
- click on the dropdown Select template and select the first entry (Paired-End HiSeq 2500 - demultiplexed)
- click at the bottom on Continue with template
Note
Here we are just associating any assay to this example data. In practice, you would make sure the assay represent how the raw data was acquired.
Step 1.2 : Select input data
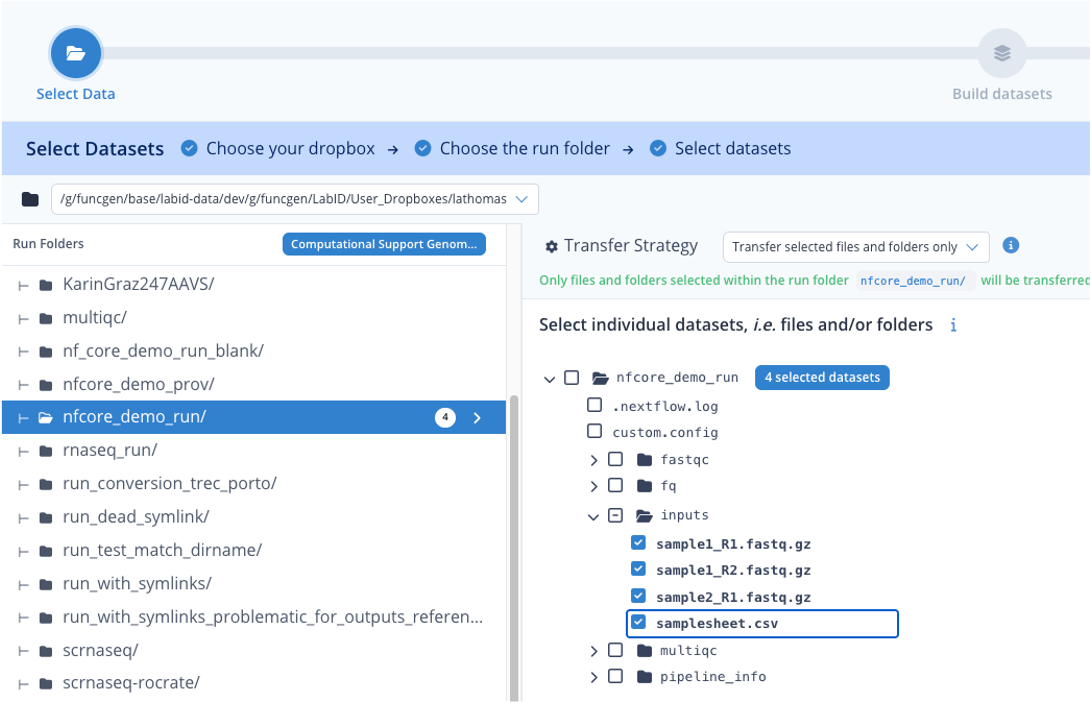
Now for the step "Select Datasets",
- under Run Folders, click on the directory "nfcore_demo_run"
- on the right, above the directory browser, for Transfer strategy, select "Transfer selected files and folders only"
- then in the file browser, extend the inputs directory, and tick the individual boxes before each files of this directory
- the dataset loader should indicate that 4 datasets are selected
- click Continue
Step 1.2 : Fill assay details
Here we are just filling a fictive assay, that would represent how our raw data was registered.
- for Multiplexed select No
- for Flowcell enter "Test flow cell"
- click Continue
Step 1.3 : Build datasets
Now we assemble the input files into datasets.
We have 3 datasets here :
- the samplesheet
- one paired-end dataset (sample1)
- one single end dataset (sample2)
Paired-end dataset
Let's assemble the paired-end dataset.
- in the table, under Datafile 1, open the Filter Preset and select "Standard Illumina"
- do the same for Datafile 2
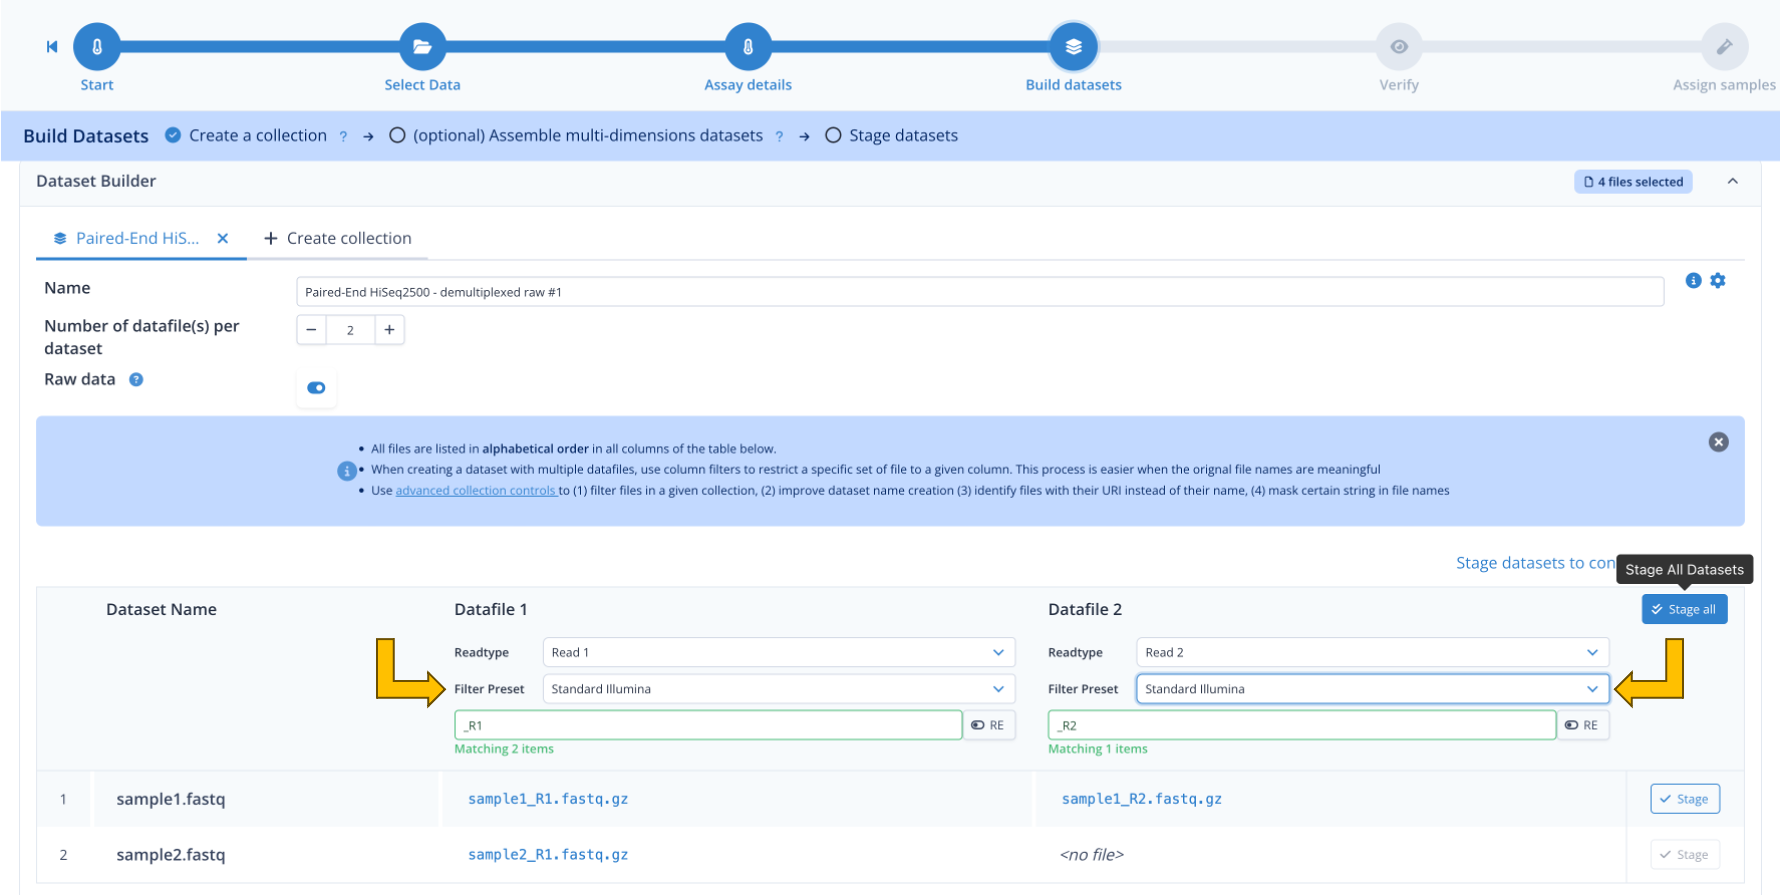
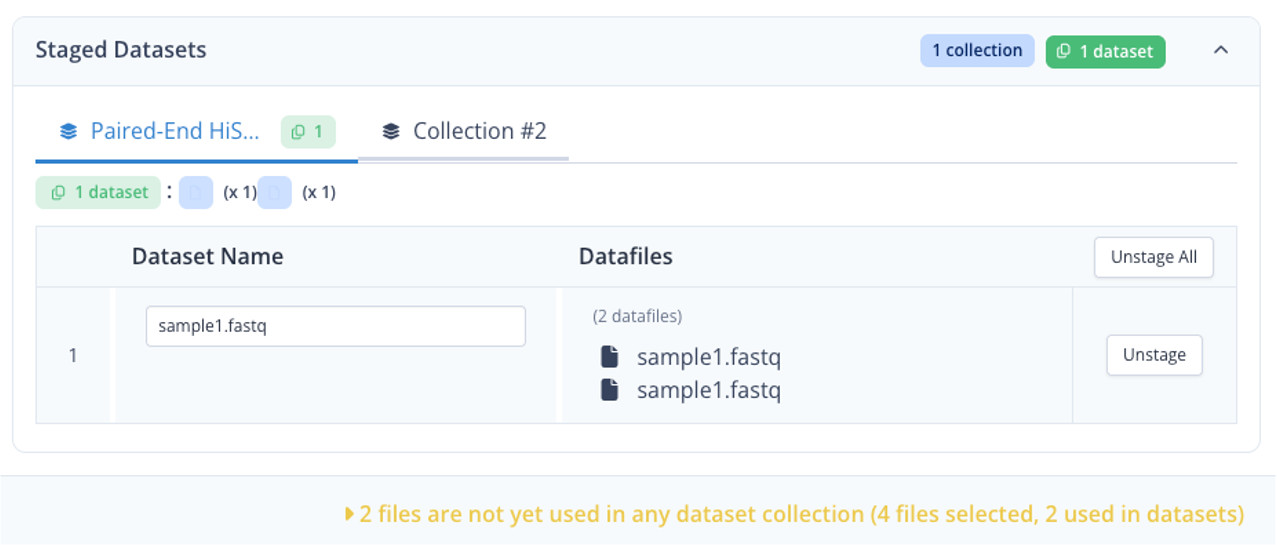
The first dataset is now assembled, you should see something like the following :
Single-end dataset and samplesheet
Let's now create 2 additional datasets, one for the single end dataset, and for the samplesheet.
- click on the tab Collection #2 at the top
- In Name enter "Inputs"
- directly click Stage All
- click Continue
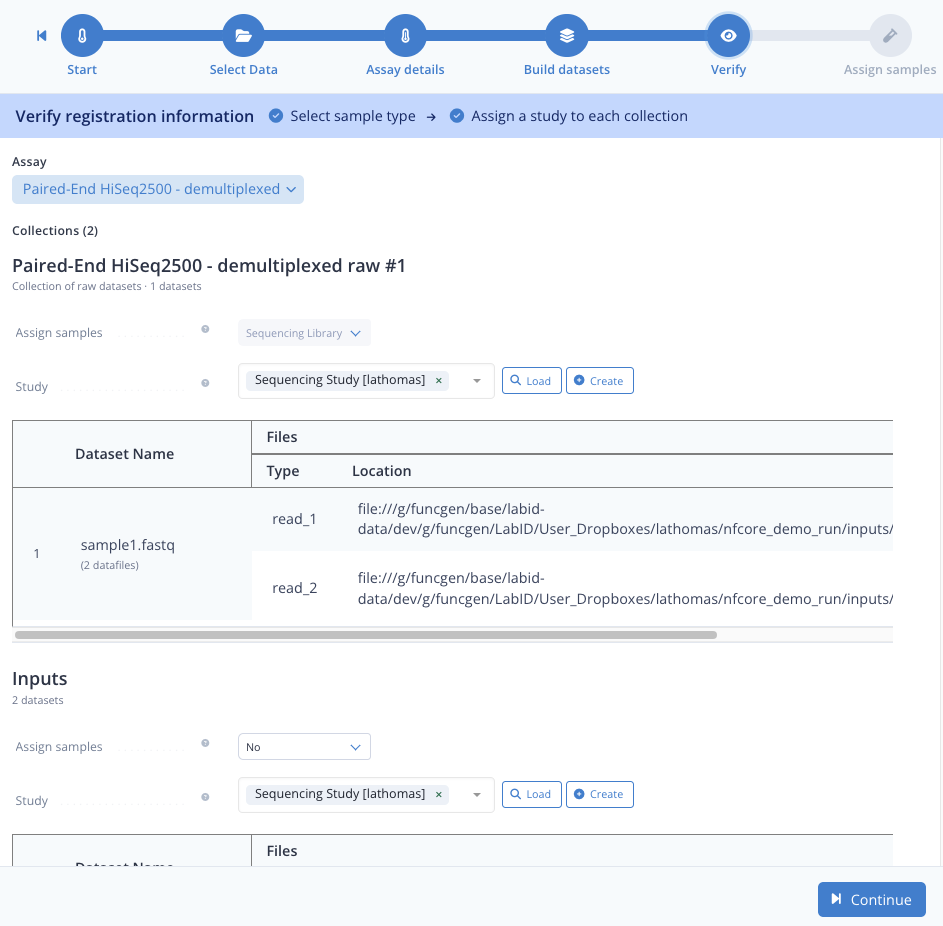
Step 1.4 : Assign datasets to study
- next to the Study button, click the Load button
- click the tickbox next to the study Sequencing Study [trainee] and click Confirm
- again Continue
Step 1.5 : Assign sample
Here we rapidly skip through, just for Barcode select None and click Submit .
Step 2 : Register the output datasets
We will follow a similar procedure to register the rest of the datasets for this workflow run, except we are not registering raw datasets this time so we dont need to specify an assay.
Step 2.1 : Select output datasets
- click again the Import datasets at the left of the app, then select Import datasets
- select again the directory nfcore_demo_run
- for the transfer strategy, select Transfer selected files and folders only
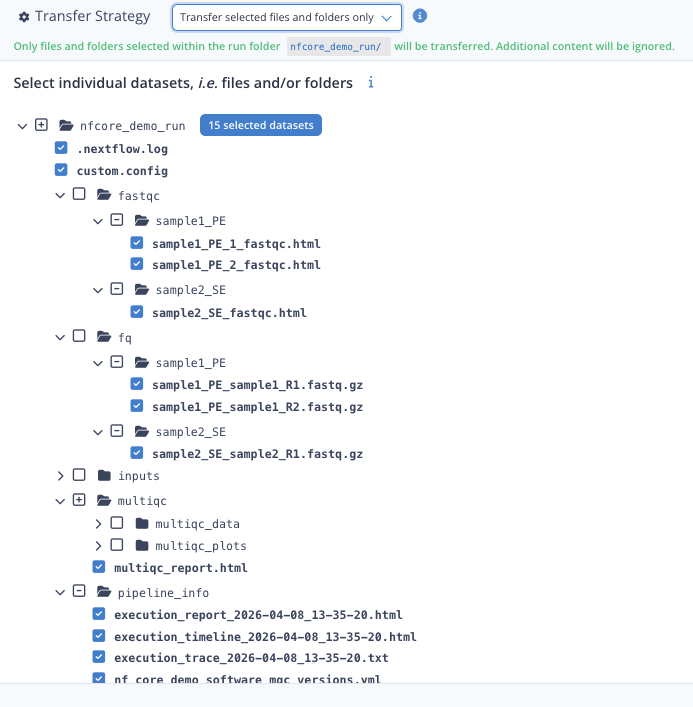
- extend all the directories as in the screenshot below
- tick the boxes for each files as below (click twice on a directory to have its contained files selected individually)
- for the multiqc directory, only tick the multiqc_report.html
- the dataset loader should display "15 selected datasets"
- click Continue
Step 2.2 : Build output datasets
Step 2.3 : Select study
- here again click the Load button
- select the same study than for the inputs (Sequencing Study [trainee])
- click Confirm and then Continue
Well done, all the data is now registered !
We can go on with the workflow run.
Step 3 : Create a new workflow run
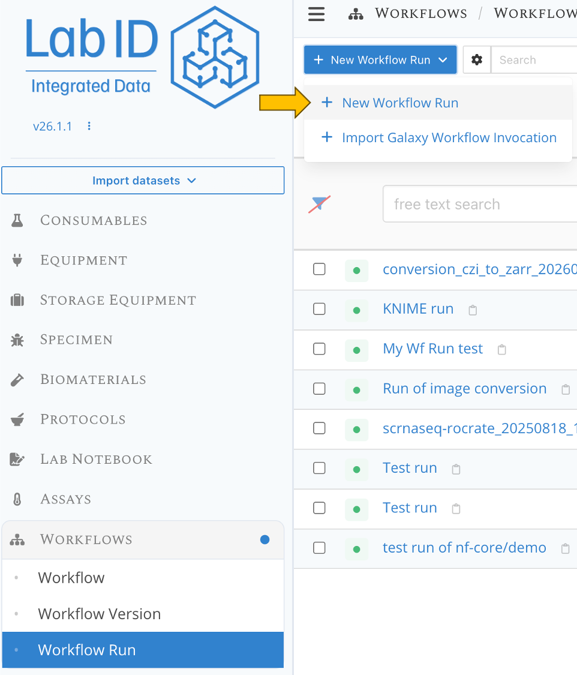
- go the workflow run list page
- click at the top left on New Workflow Run and select New workflow run.
Step 4 : Select workflow version and fill-in metadata
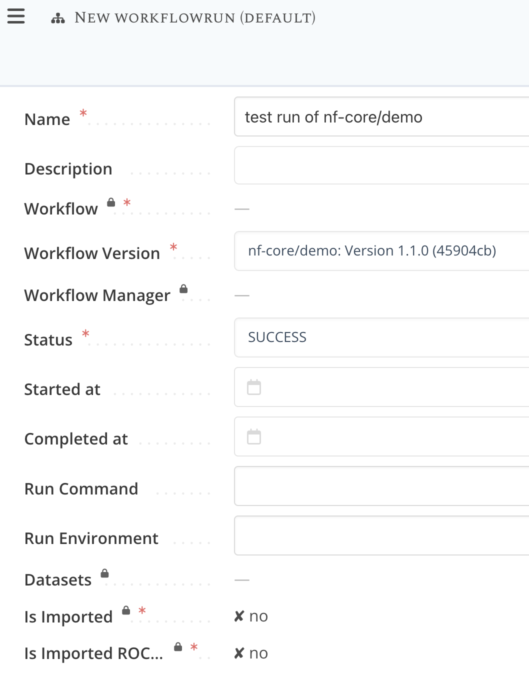
Provide information for the 3 required fields:
- a meaningful name for the run ex: "test run of nf-core/demo"
- which workflow version was used, here select the workflow version for the nf-core/demo that you imported from git
- the status of the run, select "Success"
You can also edit the visibility of this run to other users, just like any other LabID items.
All this fields can be edited at a later time.
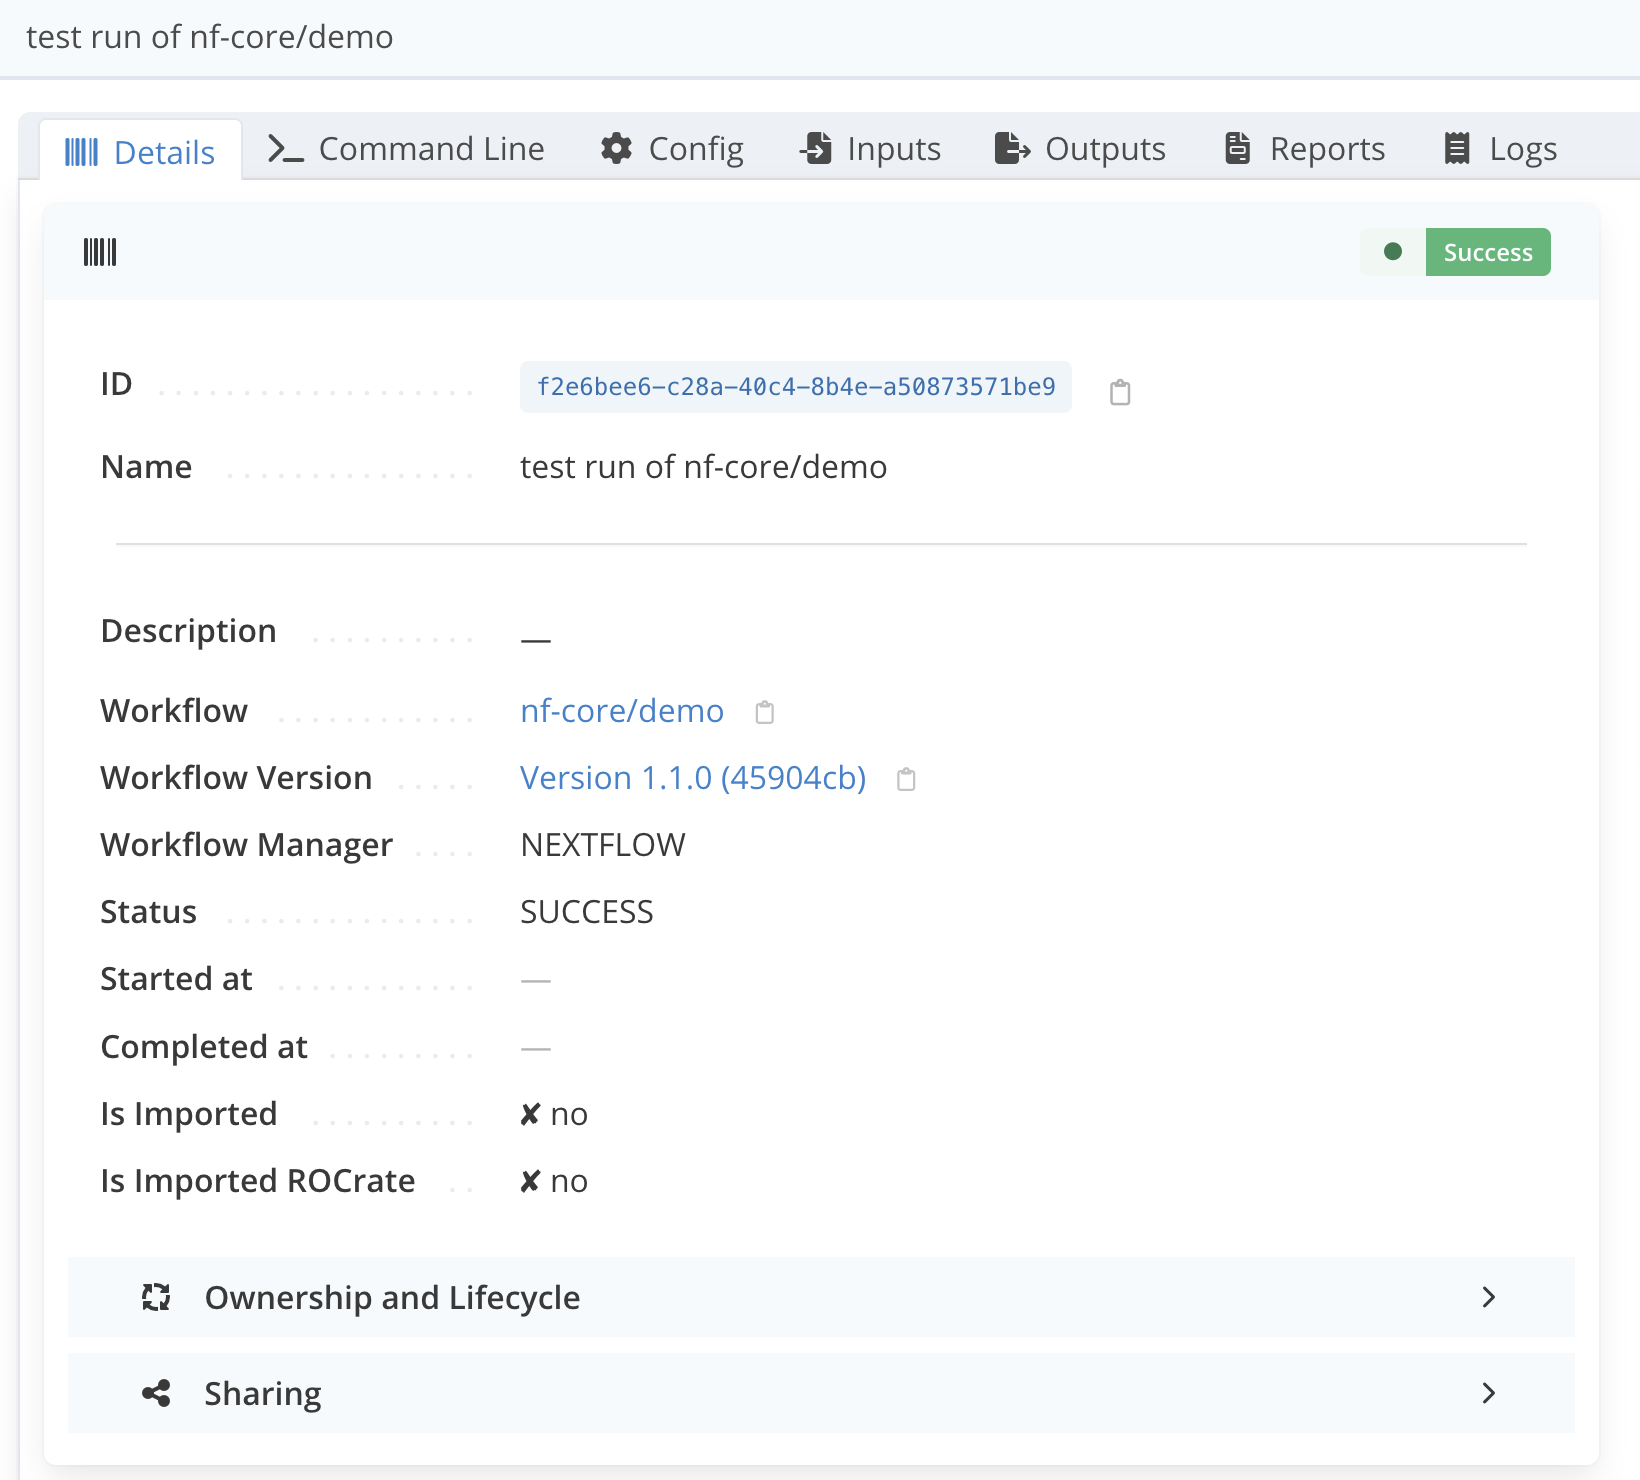
Click Save item to finalize the creation of the "blank" workflow run.
The workflow run page should now look like the following :
Pre-registering workflow runs before their execution
You may create a workflow run in LabID before the associated run is finished. This way you can use LabID to keep track of which workflows are currently running, and already link the input datasets. To do so, create a worfklow run with the status set to PENDING or RUNNING and link the input datasets as shown below. Once the workflow run has terminated, you can later edit this status, and link the outputs and other datasets generated by the workflow.
This can be convenient for e.g long-running workflows that you want to keep track of from the start.
Step 5 : Link datasets to the run
For each of the dataset tab of the workflow run, you can link datasets by clicking the Link button at the top of the tab panel.
Step 5.1 : Link the input datasets
Example to link inputs :
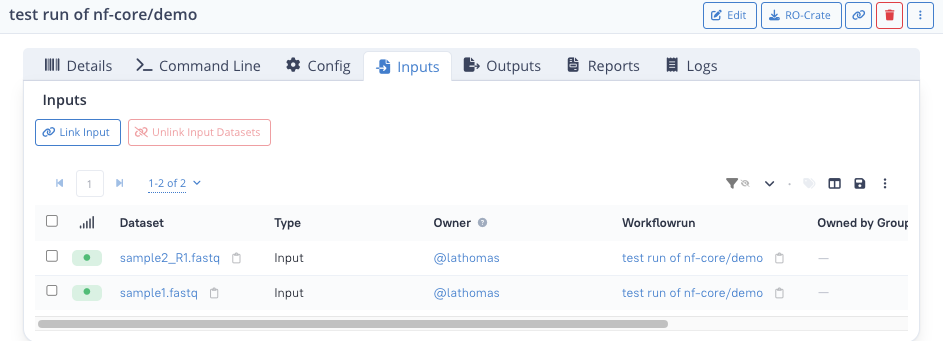
- click on the tab "Inputs"
- click on the Link input button at the top left
- from the list of datasets, tick the tickboxes next to the datasets
sample1.fastqandsample2_R1.fastq(don't click on the dataset name: this would take you to the dataset detail page) - if you cannot find the datasets, you can use the search bar at the top to filter using "sample1" for instance
- click Confirm at the bottom right
You should now see something like the following.
Datasets you can link to a workflow run
You can only associate datasets registered in LabID that are visible to your user, or your group (i.e for which you have read access).
For output datasets, only datasets for which you have write access can be associated (click the Personal at the top right in the list of datasets to filter the list). You always have write access to datasets you have registered yourself.
About datasets fetched by workflows
Some workflows automatically fetch additional data to use as input for the workflow, such as reference genomes. Ideally, you should download these datasets and register them in LabID too to fully reflect the workflow run.
Step 5.2 : Link the other dataset types
You can repeat the previous step for the other datasets types.
For Outputs, select:
- sample1_PE_sample1_R1.fastq
- sample1_PE_sample1_R2.fastq
- sample2_SE_sample2_R1.fastq
For Reports, you can select all the HTML files:
- multiqc_report.html
- execution_report_2026-04-08_13-35-20.html
- execution_timeline_2026-04-08_13-35-20.html
- sample1_PE_1_fastqc.html
- sample1_PE_2_fastqc.html
- sample2_SE_fastqc.html
For Logs, you can select the .nextflow.log, and for Configs the custom.config.
You should have the following for the Outputs tab:

Unlinking datasets
You can also unlink datasets from a workflow run, e.g. in case of mistake, unlinking does not remove the dataset from the database, it only removes the link between the run and the dataset.
To unlink some dataset(s), from one of the dataset tab, tick the datasets you would like to unlink and click "Unlink".
Step 6 : Establish parent/child relations between inputs and outputs
Some of the outputs and reports are relevant for a specific input dataset.
We can document this parent/child relation between datasets in LabID.
This way it is clear that some outputs are derived from a specific input.
It also ensures that inspecting the output dataset, one can visualize the full provenance information, all the way to the sample and specimen.
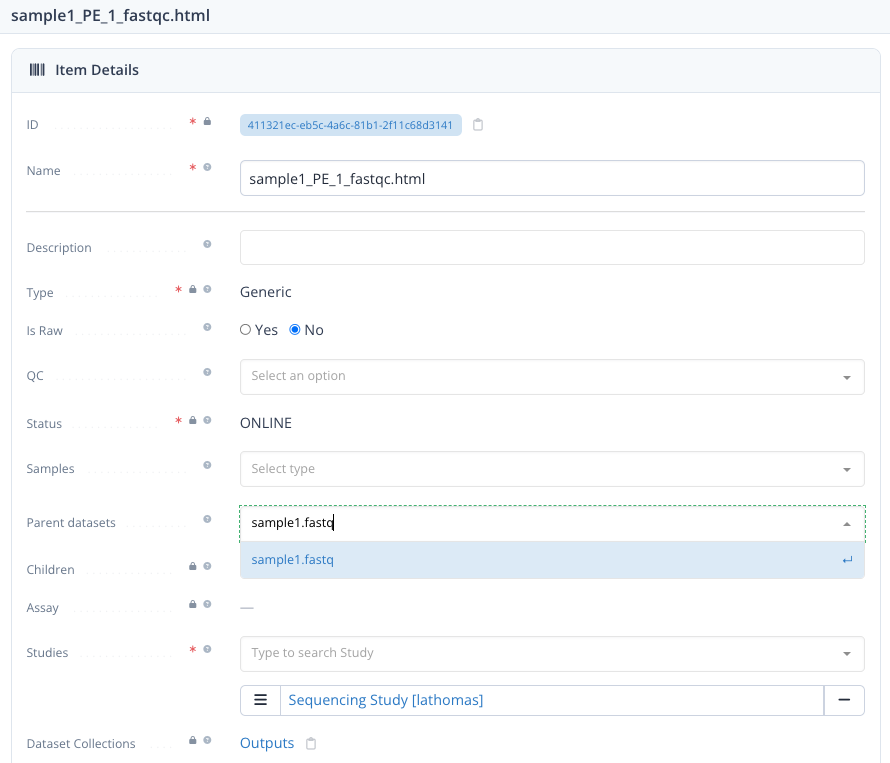
We can document this relationship, in output and report datasets by referencing the input dataset via the property Parent dataset :
- in the Output tab, click on the name of one of the output dataset ex: sample2_SE_sample2_R1.fastq
- once on the dataset detail page, click Edit at the top right
- open the dropdown for Parent dataset and select the corresponding input FASTQ dataset, here sample2_R1.fastq
- click Save and exit at the top right
You can repeat this for the report dataset sample2_SE_fastqc.html.
You can do the same for sample1, setting sample1.fastq as parent of the following datasets:
- sample1_PE_sample1_R1.fastq (output)
- sample1_PE_sample1_R2.fastq (output)
- sample1_PE_1_fastqc.html (report)
- sample1_PE_2_fastqc.html (report)
Dataset can have multiple parents
Here we had multiple children datasets for each input dataset (1 to N relation). In other cases, there can be multiple parents for a given output dataset (N to 1 relation) or even "N-to-N" relations.
Exporting workflow runs as RO-Crate
LabID can generate Workflow Run RO-Crate from workflow runs (unless the run was imported as a RO-Crate).
Simply click RO-Crate at the top right of the page to download a zip of the workflow run (be patient, this may take some time depending on the number and size of files).
Such file can be used to publish the WorkflowRun to e.g Zenodo, ROHub or to import it in another RO-Crate-capable software.
Workflow Run RO-Crate can be large !
By default, the Workflow Run RO-Crate contains all input and output datasets referenced by the run.
This can represent a large amount of data and result in a fairly large zip file !
Export as RO-Crate available for Workflow versions too
You can also "just" export the workflow version from the workflow version page.
See Exporting workflow versions.